TIPS FOR INSTALLING HAND HOLDS ON TRAVERSE WALLS®
BACKGROUND INFORMATION
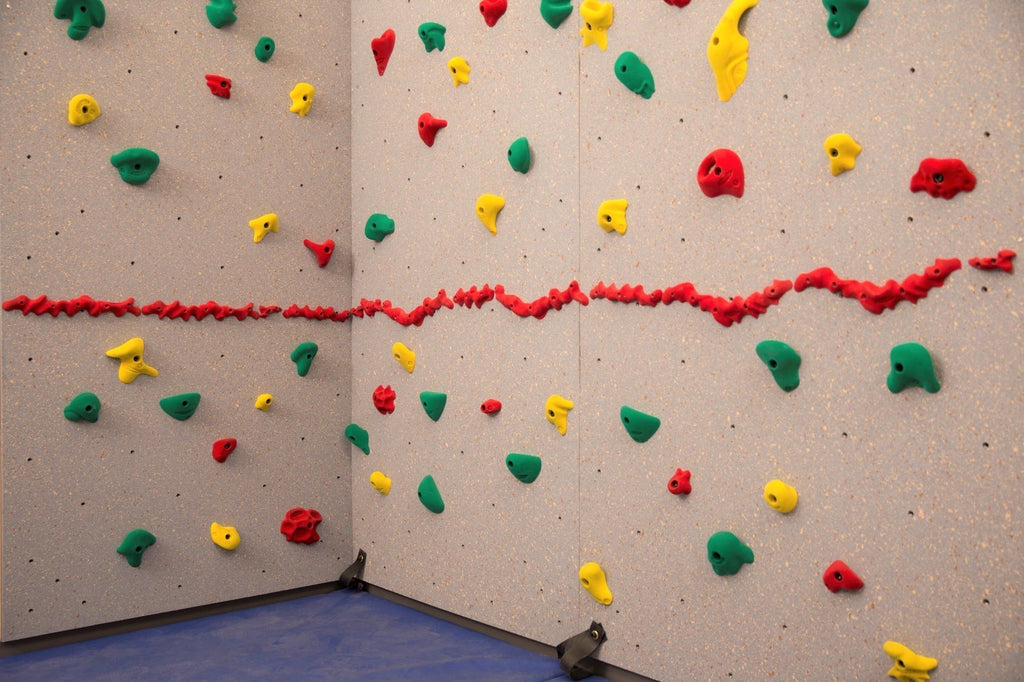
Most of the climbing walls from Everlast Climbing include color-coded hand holds to differentiate the challenge level of the climbing experience and facilitate success for climbers of varying ability levels. Each color corresponds to a difficulty level and installing them by color creates a few climbing paths (“routes”) from which climbers can choose. When they choose their own route, we call it “challenge by choice.” Be sure you communicate the colors to your climbers! Here's the key to our color-coding system:
+Green holds (beginner) = larger size and easiest to grip
+Yellow holds (intermediate) = various sizes and range from easy to grip to challenging
+Red Holds (advanced) = medium to small size and challenging to grip
+Blue Holds (experienced) = the most technical holds (only included on 10'-high Traverse Walls®)
The shape of the hand hold and how holds are positioned on the climbing wall also contribute to their difficulty level, so keep this in mind as you install them. For example, some holds have a “pocket” to grab with hands when positioned one way and then if turned 180 degrees, they are a more-challenging-to-grasp “sloper.” Familiarize yourself with each hold before you install it to choose the desired difficulty level.
For 8'-high Traverse Walls®, you will have the following number of hand holds for each 4'x8' panel section:
+7 green holds
+7 yellow holds
+6 red holds
For 10'-high Traverse Walls®, you will have the following number of hand holds for each 4'x10' panel section:
+7 green holds
+7 yellow holds
+6 red holds
+5 blue holds
GETTING STARTED
You are ready to install hand holds after your climbing panels have been installed and the Red-Relief® Line is installed (if applicable). Unpack your hand holds and lay them out on the floor grouped by color and size. You will need the included bolts and Allen wrench to install them. Refer to the installation instructions.
Next, place the appropriate number of each color hold (in varying sizes) in front of each 4'-wide climbing panel. This will help you evenly spread out each color across the length of the Traverse Wall®. Be sure to leave enough space for you to work on the installation in front of each panel.
You will first start with installing the green holds. You will want to keep the age/size/reach of your climbers in mind as you install the holds. Look at the t-nuts and choose ones that seem to be a logical place to put feet and hands. None of the holds for feet should be placed above the Red-Relief® Line, if your climbing wall has one. Space the holds to create a beginner-level route that will not require much stretching or any challenging moves. Vary the location of the smaller and larger holds. Be sure the holds span entirely from one end of the climbing wall to the other. Try it out as you create the route to make sure it’s climbable. Again, keep the age/size/reach of climbers in mind.
Next install the yellow holds in a similar way, creating an intermediate-level route. Next install the red holds in a similar way, creating a more advanced/challenging route. If your wall includes blue holds, mount them next. This will be another advanced route.
FREQUENTLY ASKED QUESTIONS
What should I think about before installing hand holds?
+Age and ability of climbers
+Size(s) of climbers. How long are their legs and arms?
+Are holds at the beginning and end of the climbing wall positioned to allow climbers to get on and off the wall easily? Remember that they are supposed to climb down, not jump, when they finish their climb.
+How you position a hold on the climbing wall can affect its difficulty level. Generally, there is an easier and harder way to position the climbing hold on the Traverse Wall®.
What are some suggestions for new climbers?
+Instead of trying the green route, new climbers should try a “Rainbow Route.” This means they can use any color hand hold, and the goal is to make it across the entire Traverse Wall® without resting or climbing down.
+Climbers can use the Rainbow Route for hands and green (or any color) for feet and vice versa.
+If climbers are struggling with a color route, they can “borrow” a hold from another route. For example, they can mostly climb using yellow holds, but sometimes ‘borrow” a green hold.
+Climbers can “borrow the floor” (climb down to the mats) if they need a little rest.
What makes a good rock-climbing route?
Safety
+The climber should not be required to climb too high (no feet above the Red-Relief® Line) or to make moves that put him/her in awkward or off-balance positions.
+The route should be climbable for people of varying heights.
Variety
+Involves a variety of different climbing moves
+Involves a variety of hand and foot placements
+Uses most of the climbing wall
+Requires some interesting or unusual moves
Difficulty Level
+The difficulty level should be consistent throughout the entire route, from start to finish.
+Keep the skill and experience of participants in mind and create routes that challenge and engage, but that do not frustrate.
+Once climbers start to climb and you discover that an area of the climbing wall is too challenging for climbers, add or relocate holds to make it easier to climb.
Why is the hand hold spinning and what do I do?
Over time some hand holds may loosen and spin. They require tightening. This is normal. Grab your Allen wrench and tighten the hold until it is secure against the climbing wall. Be sure not to overtighten. See the installation instructions.
Do I ever need to do this again?
Yes! It’s a good idea to move the location of your hand holds periodically to keep the climbing wall interesting and challenging for climbers over time. You can move a few of the holds around on each panel, or you can take everything off your wall and start fresh.
What if I need more help setting climbing routes?
If you would like more detailed guidance with route setting on your Traverse Wall®, we offer a Traverse Wall® Route-Setting Guide for purchase. This one-of-a-kind guide takes you step-by-step through the route setting process. It includes an introduction to the route setting process, route maps, hand hold installation instructions and other resources. The route maps show exactly where to place hand holds, which greatly simplifies the route setting process. Keep in mind that the guide is compatible only with Groperz® Route-Setting Hand Holds and certain climbing walls manufactured by our company. Call or email us for more information: 800-476-7366 or info@everlastclimbing.com.
DOWNLOAD A PDF OF THE INFORMATION IN THIS BLOG POST.